
Outdoor renovations
behind the scenes
When it comes to outdoor renovations and custom pool installations - it's very easy to assume everything is done right because its pretty.
Below we are going to walk you through
a project we did showing you step by step how we build things to last.
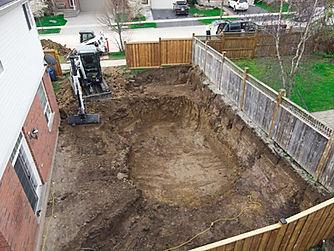
Step 1. Excavation
When building your backyard renovation - the first step is to create a "clean canvas to paint on", so to speak.
We need to make sure that all soils, concrete, grass, etc are stripped away & hauled out of your backyard.
In order to do this efficiently and in a timely manner we need to bring in excavators and other pieces of machinery
Step 2. Install The Pool
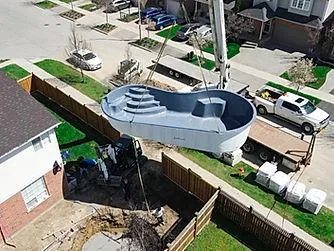
Now that we have a blank canvas and a giant hole in the ground, it's time to start installing the center piece;
Your custom inground swimming pool.
Making sure this is done with precision and accuracy is the key - as the integrity of the inground pool solely relies on quality.

Step 3. Structural Preperation
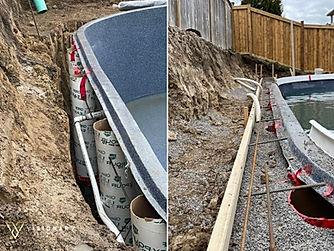
Now, there is a wide variety of custom features available (cabana, feature wall with spillway, etc) - and each feature needs to have its own structural integrity.
In the picture we show you how we built footings to transfer the load (weight) of this massive structural retaining wall.
If these footings were not installed, the weight of the wall would damage the structure of the inground pool over time.
Step 4. Custom Feature Installation
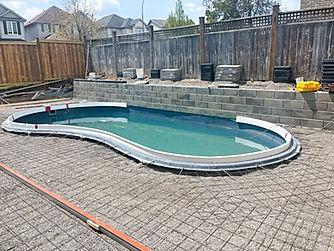
Now that everything is prepped, it's time to build the custom features that have been chosen during the initial design phase.
Whether it's a feature wall, Cabana, pergola, fire feature, etc - we have the skill and talent required to get things done.
In this picture, we had installed around 15,000 pounds of retaining wall block (which holds back the neighbors taller yard).

Step 5. Patio Installation
At this point of the backyard renovation - it is time to install the patio.
Most inground pool patio's are built out of stones (pavers / slabs) or concrete.
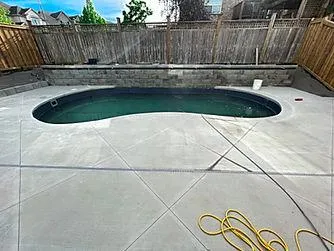
In this project, we installed roughly 1000 square feet of Concrete.
We also cut in our control joints on a 45 degree angle pattern, giving the patio a sleek & modern vibe
Step 6. Landscaping / Finishing Touches
This is the moment we've been waiting for. All the dust has settled, the project has been finished & it's officially time to knock out the punch list.
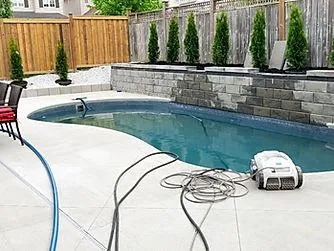
Here we typically finish off the landscaping, clean up the inground pool & any other mess.
The pressure washers are out, the brooms are at work and we are getting to that 100% completion mark on your Outdoor Renovation.

Step 7. Relax & Enjoy
Kick up your feet, bring out the water guns & fire up your BBQ.
Your inground pool has been installed and your outdoor renovation has been finished.
Don't fret, we walk you through the entire project - as well as how to maintain pool chemistry & operate all your pool equipment as well.
Before & After
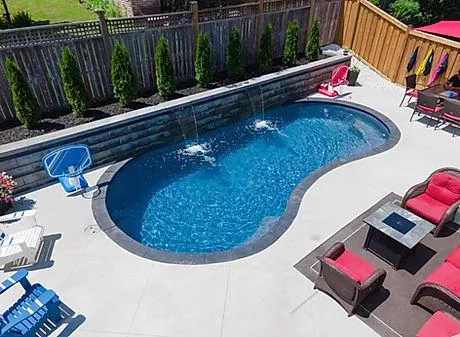
What a complete and total backyard makeover!
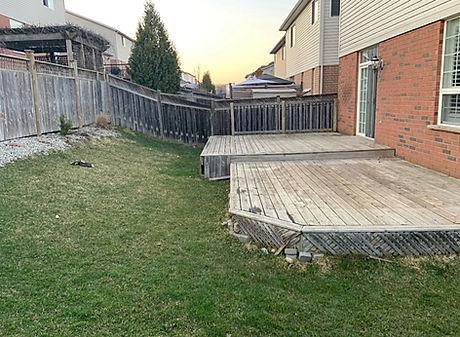
As you can see in the before picture, this backyard was rendered useless. Roughly half of the backyard was on a slope, giving our clients
very little space to actually use.
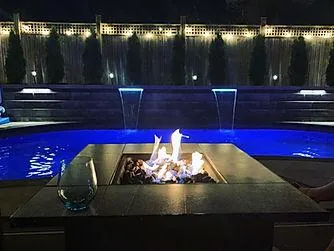
Our main focus was to open up as much useable space as possible, all centered around a beautiful inground pool + spillway combo.
The best way to accomplish that goal was to build a structural retaining wall, which holds back the neighbors higher backyard.
Service Area.
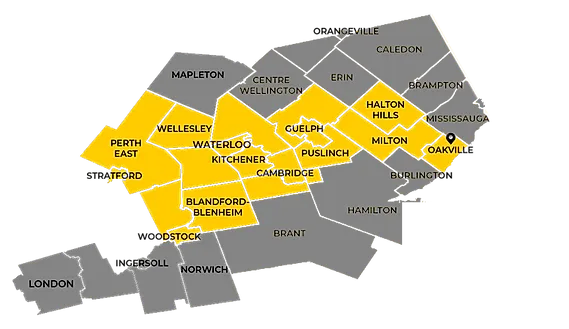
Kitchener
Waterloo
Cambridge
Guelph
Elmira
Stratford
Wellesley
Milton
Oakville
Woodstock
Pricing.
Yes. We Share Our Prices, Online.
